
Do you enjoy orientation runs or treasure hunts? Tracking routes and beating the clock? We all do! With the help of modern technology, the fun becomes unlimited.
And that is exactly what this application wants to help you with.
We love to run and navigate. We equally enjoy wastelands and urban areas when it goes for a bicycle ride or for a long walk. In the past, we used maps to navigate.
Last few years, programmers among us rounded up their sleeves and programmed some pretty nifty mobile apps to use in our adventures.
Now, we have finally derived this application from several years of experience and all previous private projects with the same purpose.
The result - the app you can use today - is a combination of most important features of several smaller applications that never made it to the public.
The Application allows you to create running, walking, cycling and similar routes by going along the way and marking physical geographic coordinates.
Make yourself and your teammates beat the clock to finish the route on time. Share created routes with your teammates to compete and see who is the fastest.
Providing creation of precise routes with coordinates and elevation info, this application will let you create most demanding routes for your friends.
Then, whether by foot or on a bicycle, they will be precisely navigated from point to point and their performance and time measured.
Please forgive us for the imperfection of this page. Being quite a new up - although already some time in development - the application pushed
the web presentation part way into the background. We promise to get things better as soon as possible! :-)
Now take some of your precious time and check main features Check Point Run brings to you:
Instead determining and entering coordinates manually, just walk/run/ride your route and add checkpoints in real time. The result will be perfectly timed and coordinated route, easy to follow, shareable with your team. Or just for your personal improvement.
Every route can be time-limited. Push yourselves and your teammates to the limit!
There is no time to check your current position every second, we know. That is why the app alerts your with appropriate sound signal whenever something significant happens (you reach the checkpoint, or the time is up).

Our background services (assuming you have the Internet connection) provides capability of storing, sharing and synchronization of routes created under the same team name. Routes are private to the team and protected with team password.
Personal statistics per-route is kept locally, and (if you set the application so) shared with the team you decide to belong to.
We know how far capabilities of GPS hardware integrated into mobile devices can go. Therefore - beside real-time heading and location info - the app provides maps services on both iOS and Android systems to help you find marked checkpoints and get oriented in space. Unless having offline maps, you will need an Internet connection for this feature too.


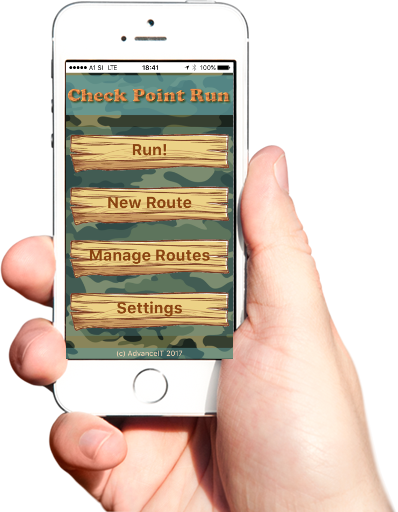
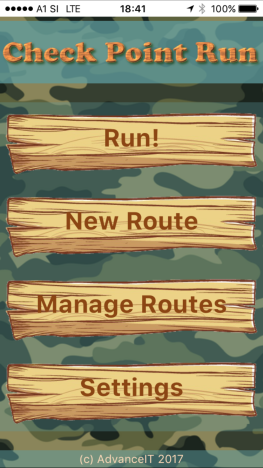 Main menu
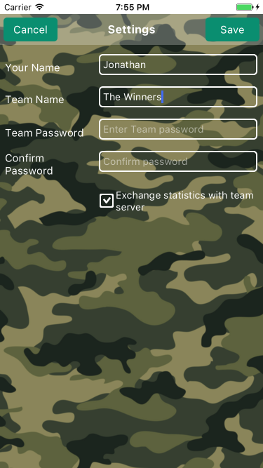 Settings
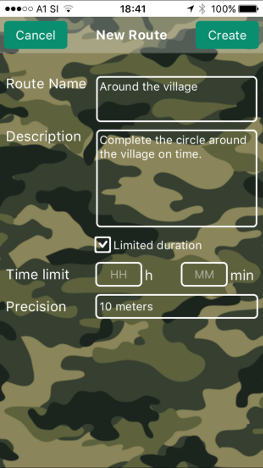 Creating a New Route
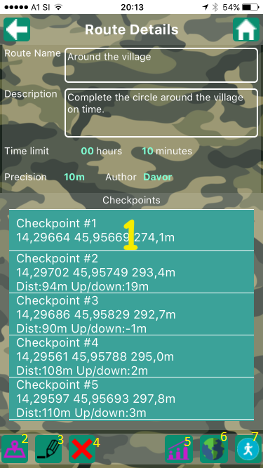 Route Details
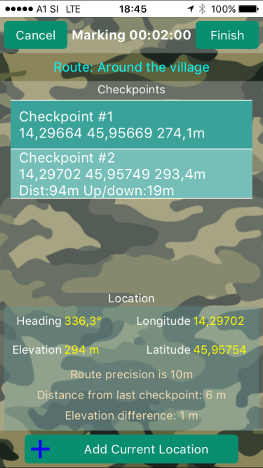 Marking The Route
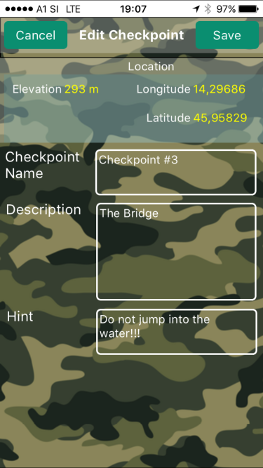 Checkpoint Details
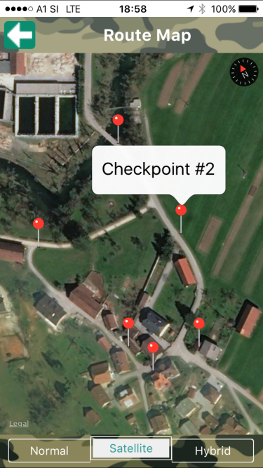 Using The Map
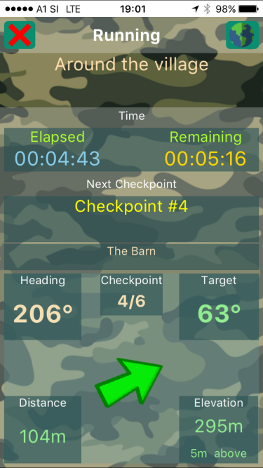 The Real Thing - Run The Route!
 Manipulating Routes
 Statistics
For questions, troubleshooting and assistence please send an E-Mail to
Check Point Run Development Team [advanceit@pleskina.com]
and explain what troubles you.
We will be glad to answer your questions and solve eventual problems! :-)